Magento 2: Creating a custom theme
 Photo by Maria Eklind, CC BY-SA 2.0
In my previous post, we went through the steps needed to create a custom module in Magento 2. While modules consist of a set of classes to add new features to Magento, a theme controls how these features, and the entire website in general, will be displayed to the user. As stated in the Magento guide, a theme uses a combination of custom templates, layouts, styles, and images to provide a consistent look and feel across a Magento store.
Creating a new Magento 2 theme
We can create a theme based on a default “parent” theme or create a standalone theme from scratch. In most cases, I would recommend the first option. For this example, we will use Luma as our parent theme. The other option would be inheriting from the default “blank” theme.
Here’s an initial task list to get our new theme ready:
- Create a new directory for the theme
- Create the
registration.phpscript - Create the
theme.xmlinformation file - Activate the new theme
Creating a new directory for the theme
While all our backend code should go in app/code, the frontend content is expected to go in app/design. And as our theme will only apply design changes to the frontend content, we should create the new directory for it under the path app/design/frontend. If we want to create a theme for the admin area instead, we need to create the directory inside app/design/adminhtml.
Let’s create a directory named EndPoint (our vendor name, continuing with the example from our previous article) and a subdirectory inside it, MyTheme:
cd {website_root}
mkdir -p app/design/frontend/EndPoint/MyTheme
Creating registration.php
Similar to the file we created for our module, registration.php tells Magento to register the new theme with the name and location we specify. Our file will be located at app/design/frontend/EndPoint/MyTheme/registration.php and should have the following content:
<?php
\Magento\Framework\Component\ComponentRegistrar::register(
    \Magento\Framework\Component\ComponentRegistrar::THEME,
    'frontend/EndPoint/MyTheme',
    __DIR__
);
This way, Magento will know what path our theme will have.
Creating theme.xml
The next step is to create our theme information file, where we will specify the theme name and parent theme. So our app/design/frontend/EndPoint/MyTheme/theme.xml file should have the following content:
<?xml version="1.0"?>
<theme xmlns:xsi="http://www.w3.org/2001/XMLSchema-instance" xsi:noNamespaceSchemaLocation="urn:magento:framework:Config/etc/theme.xsd">
    <title>MyTheme</title>
    <parent>Magento/luma</parent>
</theme>
Optional: If we want our theme to be easily distributed as a package, we can also create a composer.json file in the theme’s root directory. The content for the file should be as follows, specifying the theme’s description, dependencies, version, and license types:
{
    "name": "endpoint/mytheme",
    "description": "My Theme by End Point",
    "require": {
        "magento/theme-frontend-luma": "100.0.*",
        "magento/framework": "100.0.*"
    },
    "type": "magento2-theme",
    "version": "100.0.1",
    "license": [
        "OSL-3.0",
        "AFL-3.0"
    ],
    "autoload": {
        "files": [
            "registration.php"
        ]
    }
}
Activating our new theme
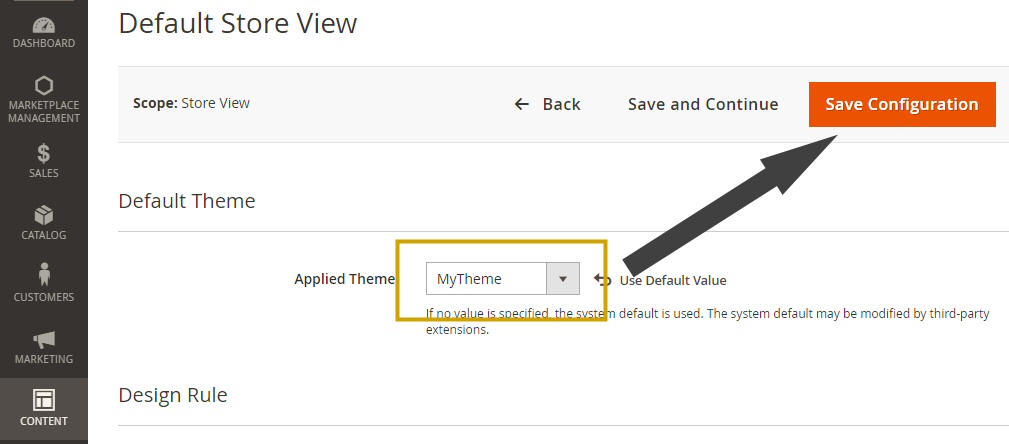
That was easy! We have everything we need to activate our new theme. To do that we log in to our admin area and enable our theme. Once in the dashboard, we need to go to Content > Design > Configuration, edit our store view, and select our new theme from the dropdown list:

Magento will search for new themes every time we log in to the admin area, so our new theme will appear on the list automatically.
Adding custom content
We have the basic structure for our theme, but when enabled, it will look the same as its parent theme (Luma, in this case), since we didn’t add any design rules or static files yet. Let’s do some more things with our theme to change how it’s displayed in the frontend:
- Create a custom
etc/view.xmlfile - Add a custom logo
- Add static files (JavaScript, CSS, images, fonts)
- Add a custom layout
Creating a custom view file
etc/view.xml controls many frontend configurations like the product thumbnail width, how the product image gallery is displayed, and the image magnifier tool, among other things. To add our custom view file to our theme, we need to copy the existing file from our parent theme. For Luma, it will be located at vendor/magento/theme-frontend-luma/etc/view.xml. To copy the file, we need to run the following in our website’s root:
mkdir -p app/design/frontend/EndPoint/MyTheme/etc
cp vendor/magento/theme-frontend-blank/etc/view.xml app/design/frontend/EndPoint/MyTheme/etc/view.xml
And then we can use our preferred text editor to change the values we want, like setting a custom size for the images in the category page grid:
<image id="category_page_grid" type="small_image">
    <width>300</width>
    <height>300</height>
</image>
Adding a custom logo
Adding a logo to our theme is really simple. We just need to save our picture in SVG format as web/images/logo.svg. If we want to use a different filename or format for our logo, we will have to create a default layout file for our theme in the path /Magento_Theme/layout/default.xml inside our theme root with content similar to this:
<page xmlns:xsi="http://www.w3.org/2001/XMLSchema-instance" xsi:noNamespaceSchemaLocation="urn:magento:framework:View/Layout/etc/page_configuration.xsd">
  <body>
    <referenceBlock name="logo">
      <arguments>
        <argument name="logo_file" xsi:type="string">images/custom_logo.png</argument>
        <argument name="logo_width" xsi:type="number">300</argument>
        <argument name="logo_height" xsi:type="number">200</argument>
        <argument name="logo_alt" xsi:type="string">Custom logo name</argument>
      </arguments>
    </referenceBlock>
  </body>
</page>
We can use different image formats such as SVG, PNG, or JPG. We can also use a custom width and height for the logo, and set a custom alternate text.
Adding static files (JavaScript/CSS/images/fonts)
All the static files should be located inside the web directory. Common static files include JavaScript files, stylesheets, images, and fonts. The JavaScript files should be located at web/js, stylesheets at web/css, images at web/images, and our custom fonts should be located at web/fonts.
All the static files will be published as direct links, without any processing from Magento, at the pub/static/frontend/EndPoint/MyTheme/en_US path. The default locale/language is en_US; we can change it for our theme if needed.
Adding a custom layout
Finally, if we want to use the new assets we added and have custom content on different sections of our website, we need to extend or override the existing layout files from our parent theme.
For example, if we want to add a reference to new stylesheet and JavaScript files we added, we need to extend the existing header layout from our parent theme. To do this, we will create a new layout file located at Magento_Theme/layout/default_head_blocks.xml:
<page xmlns:xsi="http://www.w3.org/2001/XMLSchema-instance" xsi:noNamespaceSchemaLocation="urn:magento:framework:View/Layout/etc/page_configuration.xsd">
  <head>
    <!-- Custom stylesheet -->
    <css src="css/mytheme.css"/>

    <!-- Custom JavaScript -->
    <script src="js/mytheme.js"/>
  </head>
</page>
This way we will be adding a reference to a new stylesheet named mytheme.css that we have inside the web/css directory of our theme, and a new script named mytheme.js inside the web/js directory.
After we make all the desired changes to our theme, we will need to tell Magento to update the frontend. We need to deploy the new changes and clear the cache. We can achieve that by running this from our website root:
php bin/magento setup:static-content:deploy
php bin/magento cache:clean
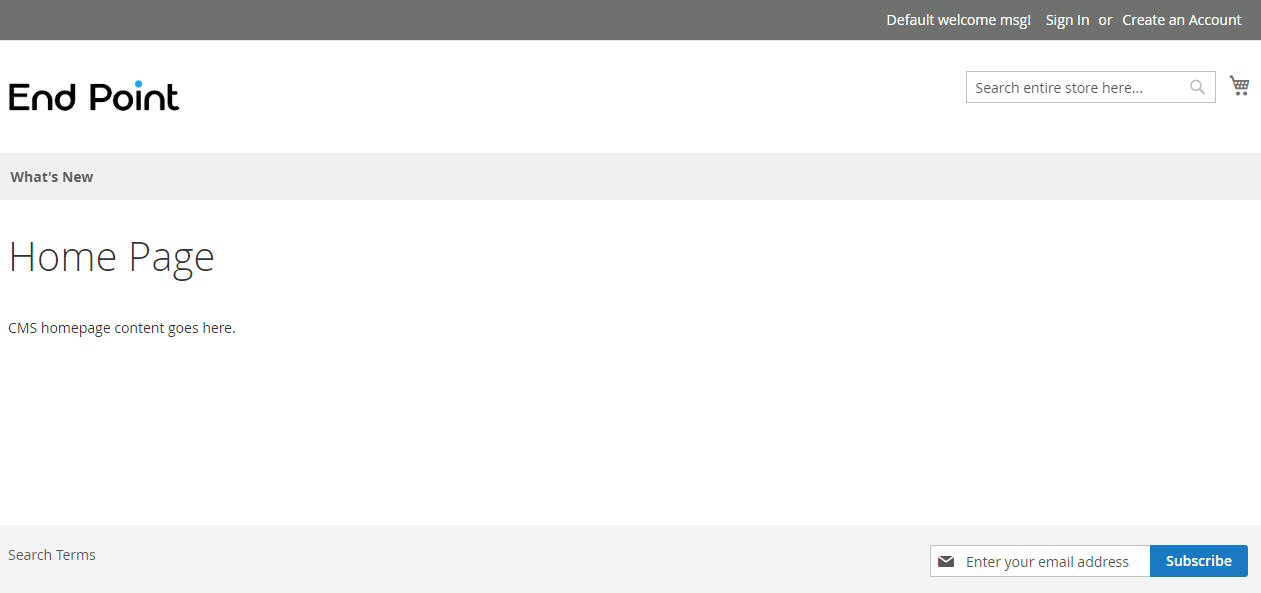
This process can take some minutes to complete. After it’s done, we can go to our website to see if the frontend changes are applied:

Looks awesome! Of course, there’s a lot more we can do from there, from extending or overriding layouts from modules (Magento or third-party) to bundling scripts or using Less files for our custom styles. But, that is material for later posts, so that’s all for now! Please add any questions you might have below.

Comments