Uploading multiple files in a single request in an ASP.NET Core application

By Kevin Campusano
July 4, 2024

We recently developed a web application for maintaining an ecommerce site’s product catalog. Unsurprisingly, one of the features involved the management of product images. Specifically, we wanted to create a page where all the images of a given product were displayed and new ones could be uploaded.
In addition to that, this wasn’t a single-page application. We weren’t using a JavaScript framework and instead were relying on regular server-rendered views with ASP.NET Razor Pages. Even so, we wanted to create a user experience with a good balance of usability and development complexity. So, we decided to create the capability of uploading several image files at once within a single request — that is, within a single HTML form submission.
In this article, I’m going to describe the solution that we came up with in order to make this happen.
To demonstrate the approach, I’ll use a sample ASP.NET Core solution that I’ve been building out throughout several blog posts. Its main feature is calculating the value of used cars and offering quotes for them. The system stores all generated quotes as database records. Given this context, we’ll add the functionality to upload image files for a given quote.
Let’s get started.
Each section is accompanied by a given commit that includes all the changes discussed within them. Feel free to check those as well to see how the finished product takes shape step by step.
Where to store the images
Commit: d65fd8.
The first decision that we have to make is where to store the image files. There are various options afforded to us by ASP.NET and our underlying PostgreSQL database, but here’s how we’re going to do it: we’ll store records in the database that represent the images associated with each quote. These records won’t actually contain image binary data, however, only references to them in the form of their file names. The files themselves will be stored in the project’s wwwroot directory. That way they can be easily served to browsers, as everything inside that directory is accessible to clients.
Starting off with a fresh ASP.NET Core Web App (with Razor Pages) project, here’s how that’s done.
First we have to make sure that the app has static file serving enabled. This is done with this function call in the Program.cs file:
// VehicleQuotes.AdminPortal/Program.cs

app.UseStaticFiles();
Next, we need to create the new database structure that will store the image records. In our app, we already have a Quote entity, backed by a corresponding quotes table in the database. The plan is to create a new QuoteImage entity and update Quote to “have many” of them.
Here’s what the new class looks like:
// VehicleQuotes.WebApi/Models/QuoteImage.cs

namespace VehicleQuotes.WebApi.Models;

public class QuoteImage
{
    public int ID { get; set; }
    public string FileName { get; set; } = default!;

    public int QuoteId { get; set; }
    public Quote Quote { get; set; } = default!;
}
We also have to add this navigation property to the Quote entity’s class:
// VehicleQuotes.WebApi/Models/Quote.cs

public class Quote
{
    // ...
    public ICollection<QuoteImage> QuoteImages { get; set; } = [];
}
And finally declare its corresponding DbSet in our VehicleQuotesContext class:
// VehicleQuotes.WebApi/Data/VehicleQuotesContext.cs

public class VehicleQuotesContext : IdentityUserContext<IdentityUser>
{
    // ...
    public DbSet<QuoteImage> QuoteImages { get; set; }
    // ...
}
Now all that’s left is to create and run the migration with these commands:
dotnet ef migrations add AddQuoteImages
dotnet ef database update
With that, our model and database are ready to store references to image files for the quotes on record.
vehicle_quotes=# \d quote_images;
                          Table "public.quote_images"
  Column   |  Type   | Collation | Nullable |             Default
-----------+---------+-----------+----------+----------------------------------
 id        | integer |           | not null | generated by default as identity
 file_name | text    |           | not null |
 quote_id  | integer |           | not null |
Indexes:
    "pk_quote_images" PRIMARY KEY, btree (id)
    "ix_quote_images_quote_id" btree (quote_id)
Foreign-key constraints:
    "fk_quote_images_quotes_quote_id" FOREIGN KEY (quote_id) REFERENCES quotes(id) ON DELETE CASCADE
Check out this commit to see the migration.
A Razor Page for uploading many files
Commit: feaa57.
Now we need to create a new Razor Page for uploading the image files. The new page will be reachable at this route: quotes/edit/{id}. {id} is the identifier of the quote record for which images will be uploaded. To that end, we’ll create the usual pair of files that make up a Razor Page: The PageModel at VehicleQuotes.AdminPortal/Pages/Quotes/Edit.cshtml.cs and the View (i.e. template) at VehicleQuotes.AdminPortal/Pages/Quotes/Edit.cshtml.
We’ll start with the PageModel. Let’s create the new file with these contents:
// VehicleQuotes.AdminPortal/Pages/Quotes/Edit.cshtml.cs

using Microsoft.AspNetCore.Mvc;
using Microsoft.AspNetCore.Mvc.RazorPages;
using Microsoft.EntityFrameworkCore;
using VehicleQuotes.WebApi;
using VehicleQuotes.WebApi.Models;

namespace VehicleQuotes.AdminPortal.Pages.Quotes;

public class EditModel : PageModel
{
    // This page will interact with the database so we need an instance of the
    // DbContext.
    private readonly VehicleQuotesContext _context;
    private readonly string _imagesPath;

    public EditModel(VehicleQuotesContext context)
    {
        _context = context;
        // Like we discussed, we will store the image files in the app's wwwroot
        // directory. Specifically, ~/wwwroot/uploads. It'd be better to
        // substitute this hard coded string with a config value from
        // appsettings.json.
        _imagesPath = "/path/to/wwwroot/uploads";
    }

    // The BindProperty attribute in this property makes it so that when a form
    // in this page is submitted, the framework takes the request payload and
    // uses it to populate this property. In our case, the form will submit a
    // set of files. We'll see how a little bit later.
    [BindProperty]
    public IEnumerable<IFormFile>? ImageFiles { get; set; }

    // This GET handler method does little else than render the corresponding
    // template when a browser requests the quotes/edit/{id} URL.
    // That is, the one defined in
    // VehicleQuotes.AdminPortal/Pages/Quotes/Edit.cshtml.
    public IActionResult OnGet(int id) => Page();

    // This is the method that handles POST requests on this page. It inspects
    // the incoming request payload and uses it to produce new quote image
    // records as well as save the uploaded files under ~/wwwroot/uploads.
    public async Task<IActionResult> OnPostSaveAsync(int id)
    {
        // First, try to find the quote record by the given id and...
        var quote = await FindQuote(id);

        // ...if it's not found, return a proper 404 response.
        if (quote == null)
        {
            return NotFound();
        }

        // If images were uploaded...
        if (ImageFiles is not null)
        {
            // ...iterate over each one of them...
            foreach (var imageFile in ImageFiles)
            {
                // ...store them in the file system...
                var imageFileName = await SaveImageFile(imageFile);
                // ...and add a new corresponding record to the quote's related
                // image records.
                quote.QuoteImages.Add(new() { FileName = imageFileName });
            }
        }

        // Finally, submit the database changes...
        await _context.SaveChangesAsync();

        // ...and effectively reload the page.
        return RedirectToPage("./Edit", new { Id = id });
    }

    // This method queries the database to find quote records by id.
    private async Task<Quote?> FindQuote(int id) =>
        await _context.Quotes
            .FirstOrDefaultAsync(m => m.ID == id);

    // This method has some mostly straightforward code to save the files from
    // the incoming HTTP request into the file system.
    private async Task<string> SaveImageFile(IFormFile fileToSave)
    {
        var extension = Path.GetExtension(fileToSave.FileName).ToLowerInvariant();
        // The only interesting thing that we have to keep in mind is that we
        // need to come up with a naming scheme that won't produce conflicts.
        // Here, we've taken the naive approach of just using
        // Path.GetRandomFileName to create randomized names.
        var fileName = $"{Path.GetRandomFileName()}{extension}";
        var filePath = Path.Combine(_imagesPath, fileName);

        using var stream = System.IO.File.Create(filePath);
        await fileToSave.CopyToAsync(stream);

        return fileName;
    }
}
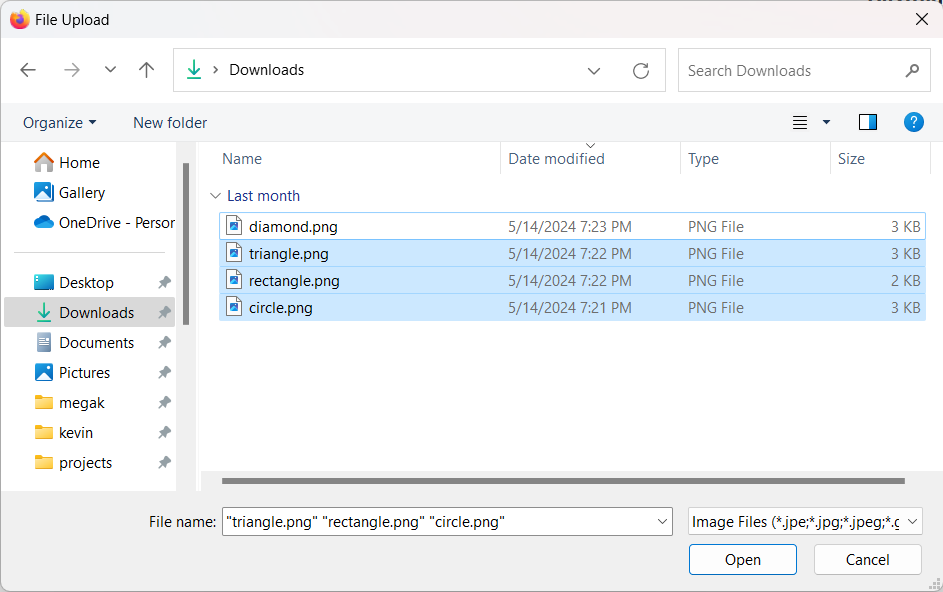
Next we need to create the View. The job of this View is to define an HTML form that supports uploading many files. We have two options for this. The first option involves creating a form with a single file input element that uses the multiple attribute. That will allow the user to pick many files at the same time using their operating system’s file picker dialog box, looking something like this:
Option number two involves defining a form with multiple file input elements with each accepting one file. The number of <input> elements cannot be static however. We want to allow users to upload as many images as they want. So, we’d also need some JavaScript to dynamically add new <input> elements as the user picks more and more files.
Both options are valid, and deciding on one over the other will depend on the user experience you’re interested in creating and the amount of effort you can devote to it. For us, we went with option #2: A dynamic set of individual file input elements.
Before making it fully dynamic, though, let’s go through the exercise of building it with a static number of <input> elements as a first step. I think that’ll help clarify the process better.
So here’s the cshtml file with three <input type="file"> elements:
<!-- VehicleQuotes.AdminPortal/Pages/Quotes/Edit.cshtml -->

@page "{id}"
@model VehicleQuotes.AdminPortal.Pages.Quotes.EditModel

@{
    ViewData["Title"] = "Details";
}

<h1>Edit</h1>

<h4>Add Images</h4>
<hr />

<div class="row">
    <!--
    The form doesn't need too many details. We do have to make sure to set its
    enctype attribute to multipart/form-data to allow it to include files.
    -->
    <form method="post" enctype="multipart/form-data">
        <div id="quote-images-container" class="row">
            <div class="col-3 mb-3">
                <!--
                These are regular old HTML file input elements. They all have
                the same name, which matches that of the property in the
                PageModel that we want the framework to populate.
                That is, "ImageFiles".
                -->
                <input
                    type="file" accept="image/*"
                    id="ImageFiles_0" name="ImageFiles" class="form-control"
                >
            </div>

            <div class="col-3 mb-3">
                <input
                    type="file" accept="image/*"
                    id="ImageFiles_1" name="ImageFiles" class="form-control"
                >
            </div>

            <div class="col-3 mb-3">
                <input
                    type="file" accept="image/*"
                    id="ImageFiles_2" name="ImageFiles" class="form-control"
                >
            </div>
        </div>

        <div class="form-group mb-3">
            <!-- This button submits the form. -->
            <button
                type="submit"
                asp-page-handler="Save"
                class="btn btn-primary"
            >
                Save
            </button>
        </div>
    </form>
</div>

<div class="row">
    <a asp-page="./Index">Back to List</a>
</div>
This is how we design our form so that when submitted, ASP.NET knows that it has to populate ImageFiles (the collection of IFormFiles that we have defined in the PageModel) with the uploaded files. All we have to do is make sure that all the input elements share the same name attribute, and that said name is the same as the target property. ImageFiles in this case. The elements’ id attribute is actually superfluous.
If you’re following along and want to run this next part on your environment, you’ll need a quote record to be able to bring it up in the page we’ve been building and add images to it. You could do so by running the
VehicleQuotes.WebApiproject withdotnet runand POST to it usingcurl:curl --location 'http://localhost:8001/api/Quotes' \ --header 'Content-Type: application/json' \ --data '{ "year": "2020", "make": "Mazda", "model": "Mazda 3", "bodyType": "Sedan", "size": "Compact", "itMoves": true, "hasAllWheels": true, "hasAlloyWheels": true, "hasAllTires": true, "hasKey": true, "hasTitle": true, "requiresPickup": true, "hasEngine": true, "hasTransmission": true, "hasCompleteInterior": true }'Then connect to the database however you like to and run the following query to learn its
id:select * from quotes;Use that
idin the URL to the page.
At this point, the feature should work. If you run the app with dotnet run, and navigate to the page we’ve been building at http://localhost:{YOUR_PORT}/Quotes/Edit/{QUOTE_ID}, you should see something like this:

Pick three image files, hit the blue “Save” button and the files should be uploaded into the wwwroot/uploads diretory…
$ ls wwwroot/uploads
sqyjb1ui.qnv.png  x1c4s4fj.rqb.png  zjaym20f.wcx.png
…and three new records should be created on the quote_images table:
vehicle_quotes=# select * from quote_images;
 id |    file_name     | quote_id
----+------------------+----------
  1 | sqyjb1ui.qnv.png |        1
  2 | zjaym20f.wcx.png |        1
  3 | x1c4s4fj.rqb.png |        1
(3 rows)
Uploading any number of files
Commit: 5aaff6.
Now that we’ve seen the general approach and key details of working with the framework to upload multiple files, it’s more clear what we need to do to support any number of files. Like I said, what we need is “some JavaScript to dynamically add new <input> elements as the user picks more and more files”.
Let’s start by removing the three file input elements (that is, the whole <div id="quote-images-container"> element) and replacing them with this:
<!-- VehicleQuotes.AdminPortal/Pages/Quotes/Edit.cshtml -->

<!-- ... -->

<div id="quote-images-container" class="row">
    <div class="col-3 mb-3">
        <input type="file" accept="image/*" id="new-quote-image-file" class="form-control" />
    </div>
</div>

<template id="quote-image-template">
    <div class="col-3 mb-3">
        <input type="file" accept="image/*" name="" id="" class="form-control" />
    </div>
</template>
We’ve reduced the three file input elements to just one and, most importantly, we’ve added a template that we’ll use to add new ones. If you’re not familiar, you can read more about templates in MDN. But the basic idea is that this element will not actually be visible in the page as it is. Instead, we will write some JavaScript that uses it to create new file inputs as the user fills out the currently present ones.
We will create a new JavaScript file that will contain that logic. Let’s first add a reference to it in the View:
<!-- VehicleQuotes.AdminPortal/Pages/Quotes/Edit.cshtml -->

<!-- ... -->

@section scripts {
    <script src="~/js/quotes.new-images.js" asp-append-version="true"></script>
}
And here’s what that JavaScript file looks like:
// VehicleQuotes.AdminPortal/wwwroot/js/quotes.new-images.js

window.addEventListener('DOMContentLoaded', _event => {
    // First of all we attach the "addNewFileInput" function to the change event
    // of the default file input element.
    const newFileInput = document.querySelector("#new-quote-image-file");
    newFileInput.addEventListener("change", addNewFileInput);

    // We use this counter to set the ids of the file input elements as they get
    // added.
    let imageInputCount = 0;

    // This function, which handles the file input's change event, updates the
    // input element that triggered the event so that it can be submitted with
    // the form and also creates a new empty file input ready to accept a new
    // file. See the comments on the "convertToSubmittable" and
    // "createNewFileInput" functions to learn how.
    function addNewFileInput(event) {
        convertToSubmittable(event.target)
        createNewFileInput();

        imageInputCount++;
    }

    // This function takes the file input element that the user interacted with
    // and changes its name to "ImageFiles". That way, when the form is
    // submitted, ASP.NET knows that it needs include the file from this
    // element when populating the "ImageFiles" property.
    // We also detach the change event handler, because once a file
    // is selected on it, we don't want new inputs being created if the user
    // changes the file. It is only the new empty file input that will be
    // responsible of creating another new empty one once it is filled.
    function convertToSubmittable(fileInput) {
        fileInput.setAttribute("name", "ImageFiles");
        fileInput.setAttribute("id", `ImageFiles_${imageInputCount}`);

        fileInput.removeEventListener("change", addNewFileInput);
    }

    // Here we leverage the template to create and attach a new empty file input
    // element. Importantly, we set the addNewFileInput to handle its change
    // event. That way, when the user picks a file to put in the newly created
    // file input, the whole process runs again to get the element ready for
    // submission and create a new empty one.
    function createNewFileInput() {
        const template = document.querySelector("#quote-image-template");
        const clone = template.content.cloneNode(true);

        let fileInput = clone.querySelector("input");
        fileInput.setAttribute("id", "new-quote-image-file");

        appendToContainer(clone);

        fileInput.addEventListener("change", addNewFileInput);
    }

    function appendToContainer(element) {
        const container = document.querySelector("#quote-images-container");
        container.appendChild(element);
    }
});
So the overall strategy is something like this: At page load, we start with an empty file input. Once a file is selected for it, the input gets updated so that it is ready for submission. Then a new empty file input is created which will serve the same purpose as the initial one. This creates a “cycle” where a single new empty file input is always created as a result of users picking files, allowing them to keep adding files one by one.
So the page starts looking like this:
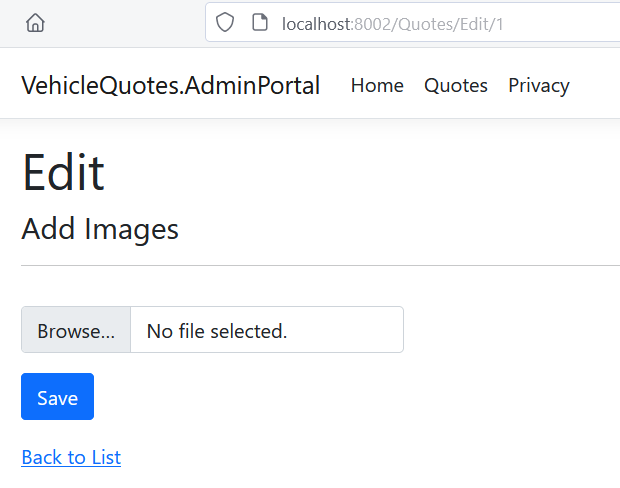
If we pick a file, the page turns into this:
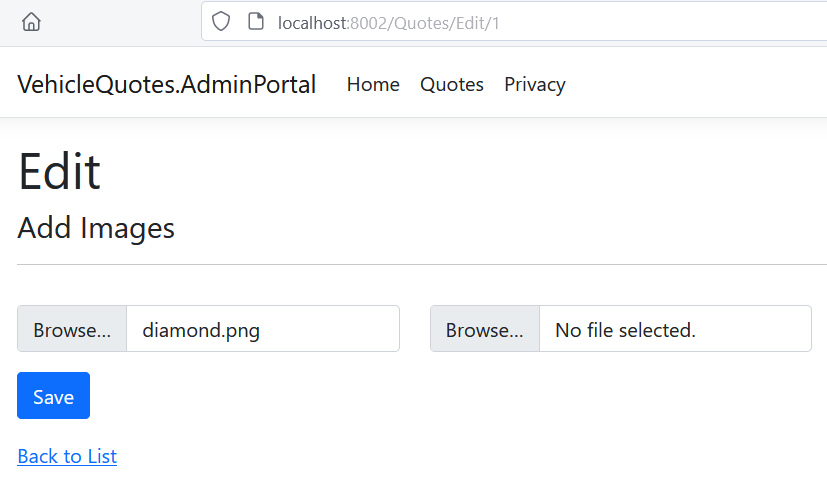
Pick another, and now it looks like this:
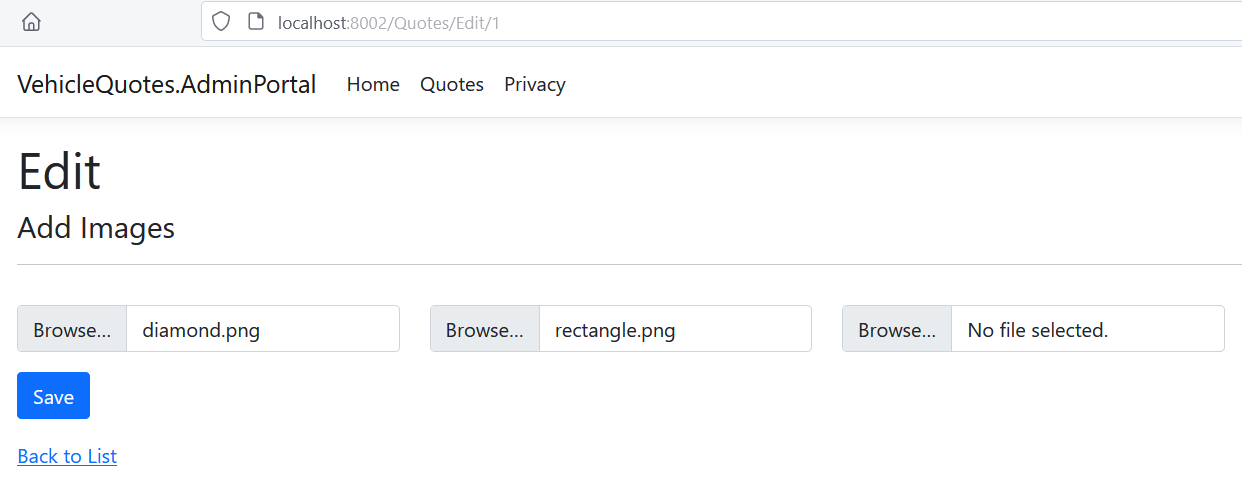
And so on.
Now users can pick as many files as they want, hit the “Save” button, and everything just works.
And with that, the initial promise of this blog post is fulfilled. However, there are a few more improvements and features that we can add.
Validating the uploaded images
Commit: 06b547.
Something obvious that’s missing is validation. Right now, our app allows users to upload anything they want. We can limit that a bit with a couple of validation attributes.
For example, here’s one that only allows files with the most common image extensions:
// VehicleQuotes.AdminPortal/Validation/AllFilesHaveImageFileExtensionAttribute.cs

using System.ComponentModel.DataAnnotations;

namespace VehicleQuotes.AdminPortal.Validation;

[AttributeUsage(AttributeTargets.Property)]
public class AllFilesHaveImageFileExtensionAttribute : ValidationAttribute
{
    // These are the file extensions that we accept.
    private static readonly string[] imageExtensions =
        [".png", ".jpg", ".jpeg", ".gif", ".bmp"];

    // This method is called by the framework when processing the request to
    // validate the incoming payload.
    protected override ValidationResult? IsValid(
        object? value, ValidationContext context
    ){
        if (value == null) return ValidationResult.Success;

        ThrowIfTypeIsNotSupported(value);

        if (!CheckIfIsValid(value))
            return new ValidationResult(GetErrorMessage());

        return ValidationResult.Success;
    }

    // In this method we make sure that the attribute is only applied to
    // properties of type IEnumerable<IFormFile>. It only works with those.
    private void ThrowIfTypeIsNotSupported(object value)
    {
        if (value is not IEnumerable<IFormFile>)
        {
            throw new ArgumentException($"{GetType().Name} only works with properties of type IEnumerable<IFormFile>.");
        }
    }

    // Here we check that all the files in the collection meet the criteria
    // defined in "HasImageExtension".
    private static bool CheckIfIsValid(object value)
    {
        var files = (IEnumerable<IFormFile>)value;
        return files.All(HasImageExtension);
    }

    // This is the core of our validation logic. This method checks that each
    // given file has one of the extensions from the "imageExtensions" array.
    private static bool HasImageExtension(IFormFile file)
    {
        var extension = Path.GetExtension(file.FileName).ToLowerInvariant();

        if (string.IsNullOrEmpty(extension) || !imageExtensions.Contains(extension))
        {
            return false;
        }

        return true;
    }

    // Here we produce an error message that's easily understandable for users.
    // Letting them know which extensions our app supports.
    private static string GetErrorMessage()
    {
        var allowedExtensions = string.Join(", ", imageExtensions);
        return $"Only the following file extensions are allowed: {allowedExtensions}.";
    }
}
The attribute can be applied to the ImageFiles property in the PageModel like this:
// VehicleQuotes.AdminPortal/Pages/Quotes/Edit.cshtml.cs

[BindProperty]
[AllFilesHaveImageFileExtension] // <- Here's the new attribute.
public IEnumerable<IFormFile>? ImageFiles { get; set; }
And here’s another one that checks that none of the incoming files are empty:
// VehicleQuotes.AdminPortal/Validation/AllFilesAreNotEmptyAttribute.cs

using System.ComponentModel.DataAnnotations;

namespace VehicleQuotes.AdminPortal.Validation;

[AttributeUsage(AttributeTargets.Property)]
public class AllFilesAreNotEmptyAttribute : ValidationAttribute
{
    protected override ValidationResult? IsValid(object? value, ValidationContext context)
    {
        if (value == null) return ValidationResult.Success;

        ThrowIfTypeIsNotSupported(value);

        if (!CheckIfIsValid(value)) return new ValidationResult(GetErrorMessage());

        return ValidationResult.Success;
    }

    private void ThrowIfTypeIsNotSupported(object value)
    {
        if (value is not IEnumerable<IFormFile>)
        {
            throw new ArgumentException($"{GetType().Name} only works with properties of type IEnumerable<IFormFile>.");
        }
    }

    // This is the only part that's meaningfully different from the other
    // validation attribute we just wrote. Here, we simply check that the
    // uploaded file's length attribute is greater than zero. In other words:
    // we check that the file isn't empty.
    private static bool CheckIfIsValid(object value)
    {
        var files = (IEnumerable<IFormFile>)value;
        return files.All(file => file.Length > 0);
    }

    private static string GetErrorMessage() => "Some of the selected files appear to be empty.";
}
It can be applied similarly:
// VehicleQuotes.AdminPortal/Pages/Quotes/Edit.cshtml.cs

[BindProperty]
[AllFilesHaveImageFileExtension]
[AllFilesAreNotEmpty] // <- Here it is.
public IEnumerable<IFormFile>? ImageFiles { get; set; }
The last step is to actually trigger the input validation when the request is received. This can be done with this update to the OnPostSaveAsync handler:
public async Task<IActionResult> OnPostSaveAsync(int id)
{
    var quote = await FindQuote(id);

    if (quote == null)
    {
        return NotFound();
    }

+    if (!ModelState.IsValid)
+    {
+        return Page();
+    }

    if (ImageFiles is not null)
    {
        foreach (var imageFile in ImageFiles)
        {
            var imageFileName = await SaveImageFile(imageFile);
            quote.QuoteImages.Add(new() { FileName = imageFileName });
        }
    }

    await _context.SaveChangesAsync();

    return RedirectToPage("./Edit", new { Id = id });
}
Oh! And don’t forget the necessary using statement near the top of the file:
using VehicleQuotes.AdminPortal.Validation;
We probably also want to add a validation summary in the View so that an error message is shown whenever the validation fails. We put it inside the <form> element:
<form method="post" enctype="multipart/form-data">
+    <div asp-validation-summary="All" class="text-danger"></div>

    <!-- ... -->
</form>
Attempting to upload invalid files produces something like this:
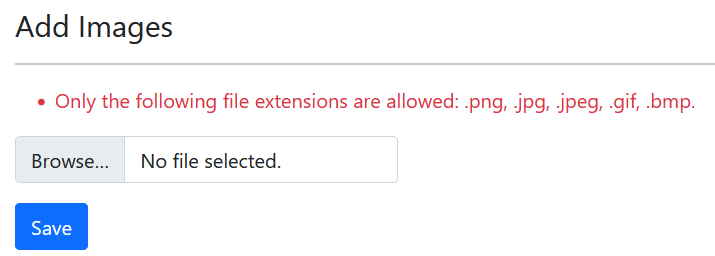
There are more complex validations that can be done. Check out ASP.NET’s official docs to learn more.
Displaying the images
Commit: d15d35
So far we’ve added support for uploading images. We should have a way of displaying the ones that are already in the system as well. Luckily this is quite a straightforward problem to solve. To do that, we need to update our PageModel’s GET request handler so that it fetches the corresponding quote record from the database. Also, we need to create a new property to store this quote, so that it is accessible in the View.
All in all, the PageModel has to be updated to look like this:
// VehicleQuotes.AdminPortal/Pages/Quotes/Edit.cshtml.cs

// ...

public class EditModel : PageModel
{
    // ...

    // Here's the property we talked about. We need it so that the View can
    // access the quote record fetched in the handler.
    public Quote Quote { get; set; } = default!;

    // ...

    // public IActionResult OnGet(int id) => Page(); <- This gets removed.

    // This is our new GET request handler.
    public async Task<IActionResult> OnGetAsync(int id)
    {
        var quote = await FindQuote(id);

        // Return a 404 if the quote doesn't exist.
        if (quote == null)
        {
            return NotFound();
        }

        // Don't forget to store the quote in the property.
        Quote = quote;

        return Page();
    }

    // ...

    // We also need to update the query so that the image records are also
    // fetched, along with the particular quote we're interested in.
    private async Task<Quote?> FindQuote(int id) =>
        await _context.Quotes
            .Include(m => m.QuoteImages) // <- We need to add this.
            .FirstOrDefaultAsync(m => m.ID == id);
}
The View will need a way to calculate the images’ URLs. We could put that logic in the .cshtml template itself, but a simple property on QuoteImage would be a bit cleaner. Here’s what it would look like:
// VehicleQuotes.WebApi/Models/QuoteImage.cs

namespace VehicleQuotes.WebApi.Models;

public class QuoteImage
{
    // ...

    // Taking advantage of the fact that we know that the image files are stored
    // in the wwwroot/uploads directory, we can construct a URL that can be used
    // in the src attribute of <img> elements.
    public string Url => $"~/uploads/{FileName}";
}
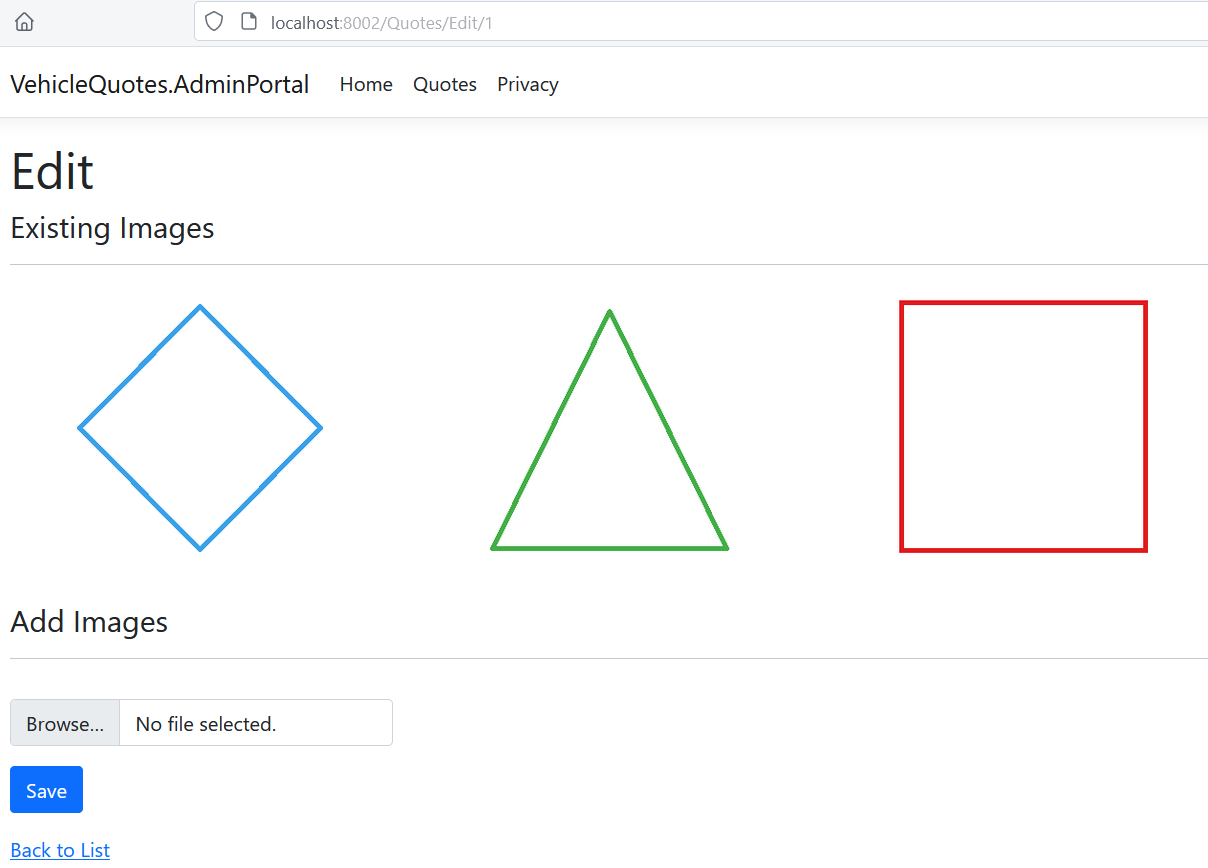
Finally, in the View, we update the HTML template to iterate over the loaded quote’s QuoteImages and render them. Let’s add this code right above the “Add Images” header:
<!-- VehicleQuotes.AdminPortal/Pages/Quotes/Edit.cshtml -->

<h4>Existing Images</h4>
<hr />

<div class="row mb-4">
    @foreach (var image in Model.Quote.QuoteImages)
    {
        <div class="col-3">
            <img
                src="@image.Url"
                asp-append-version="true"
                alt="Quote image"
                class="mx-auto d-block w-75"
            />
        </div>
    }
</div>
The page should now look something like this:
Deleting the images
Commit: 2526f2.
The last piece of the puzzle that’s missing from our image file management screen is the ability to delete them. The Razor Pages way of doing this is with a new button that submits a form to a named page handler.
The form and button combo looks like this and can be added right below the <img> element that we added inside the foreach loop in the previous section:
<!-- VehicleQuotes.AdminPortal/Pages/Quotes/Edit.cshtml -->

<form method="post">
    <button
        type="submit"
        asp-page-handler="DeleteImage"
        asp-route-imageId="@image.ID"
        class="btn btn-outline-danger mx-auto d-block"
    >
        Delete
    </button>
</form>
The asp-page-handler attribute tells the framework which handler to call when this form gets submitted. We will write that handler shortly! The asp-route-imageId on the other hand, defines a parameter to pass to the handler.
Now for the handler, here’s the code that we need to add to our PageModel:
// VehicleQuotes.AdminPortal/Pages/Quotes/Edit.cshtml.cs

// This is the handler method. Its name matches the asp-page-handler attribute
// on the button that triggers the form submission. The id parameter comes from
// the URL route (i.e. quotes/edit/{id}). The imageId parameter comes from the
// asp-route-imageId attribute in the form's submit button.
public async Task<IActionResult> OnPostDeleteImageAsync(int id, int imageId)
{
    // Find the quote record by id...
    var quote = await FindQuote(id);

    // ...and return a 404 if no quote is found.
    if (quote == null)
    {
        return NotFound();
    }

    // Get the image referenced by imageId. That is, the one for which the
    // delete button was pressed.
    var imageToDelete = quote.QuoteImages.FirstOrDefault(i => i.ID == imageId);

    // Again, return a 404 if no such image record exists.
    if (imageToDelete == null)
    {
        return NotFound();
    }

    // If all goes well, we delete the image file...
    DeleteImageFile(imageToDelete.FileName);
    // ...and also delete the corresponding database record.
    _context.QuoteImages.Remove(imageToDelete);
    await _context.SaveChangesAsync();

    // And finally reload the page.
    return RedirectToPage("./Edit", new { Id = id });
}

// This method uses the typical .NET library features for deleting a file.
private void DeleteImageFile(string fileName)
{
    var filePath = Path.Combine(_imagesPath, fileName);
    System.IO.File.Delete(filePath);
}
With that, each image rendered in the page should now have a working “Delete” button that looks like this:

Alright! Now we have a fully functional image handling page where we can view, add and remove images associated with a particular entity in our system. The neat part is that users can select as many files as they want and upload them all at the same time within a single form submission. We did all this with Razor Pages, using framework features, and a little bit of JavaScript.
Comments