Using Docker Compose to Deploy a Multi-Application .NET System

By Kevin Campusano
July 13, 2024

This post was co-authored by Juan Pablo Ventoso
We recently developed a system that involved several runtime components. It was an ecommerce site that included a database, a web API, an admin control panel web app, and a frontend SPA.
There are many ways to deploy such a system. For us, we wanted the infrastructure to be easily replicable for multiple environments with slightly different configurations. We wanted to be able to have, for example, a production and a staging version that could be deployed easily, with minimal configuration changes. We also wanted the infrastructure to be captured in files and version controlled, to further help replicability and maintainability.
With all that in mind, Docker Compose seemed like an ideal option. We could author a series of configuration files, parameterize environment-specific changes and, with a single command, we could spin up a whole environment to run the various applications within the system.
In this blog post, I’ll explain how we did that using a demo .NET code base that has a similar set of components. Let’s get started.
Getting familiar with the demo project
In .NET terms, our demo code base is organized as a solution with multiple projects. Two of those projects are ASP.NET web applications: a Razor Pages web app (the admin portal), and an MVC Web API. The rest are class libraries that define the core domain logic, tests, and other utilities. For deployment purposes, the web application projects are the interesting ones, as they produce executables that actually need to run as processes in the server. So, including the database, our demo system has three runtime components:
- The database.
- The admin portal.
- The web API.
In the world of Docker, that would translate into three separate containers. Considering Docker Compose, that means three separate services.
Throughout this post, we will, step by step, build a compose.yaml, a set of Dockerfiles, and other configuration files which can be used with Docker Compose to deploy our system.
You can find the system’s source code on GitHub. The final version of the deployment files we’ll build in this article are also on GitHub.
Including the code base repository as a Git submodule
Considering the separation of our components, the reasons for the organization of our deployment configuration files and our code base starts to become apparent. The deployment files will live in their own repository. They do need access to the system’s source code, though, in order to build and run the apps. And that source code lives in its own repo. So, the deployment repository will include a source subdirectory, which will be a Git submodule that points to the repository where the system’s source code is stored.
Here’s the file structure that we’re aiming for:
.
├── compose.yaml
├── the various dockerfiles...
├── source
│   ├── vehicle-quotes.sln
│   └── the varous projects...
└── any other files and directories...
Including a Git repository inside another Git repository as a submodule is easy. In our case, we already have the parent Git repo, which is the one where the deployment config files live. To add the source code repo to it, we run a command like this:
git submodule add git@github.com:megakevin/end-point-blog-dotnet-8-demo.git source
Pretty straightforward. The command is calling git submodule add and passing it the location of the repo on GitHub and the directory in which to clone it. That’s it. As a result of that command, Git will have created a new source directory with the contents of the end-point-blog-dotnet-8-demo repository, and a .gitmodules file with contents like these:
[submodule "source"]
  path = source
  url = git@github.com:megakevin/end-point-blog-dotnet-8-demo.git
As you can see, this file contains the information Git needs to know that this repo has a submodule, where it is, and where it comes from.
Deploying the database
Let’s begin actually building out our system components with the database. Our apps use a PostgreSQL database to store information. Luckily for us, getting a PostgreSQL database up and running with Docker Compose is easy. All it takes is a compose.yaml file like this:
# ./compose.yaml

services:
  # This is the name of the service: "db". Other containers will use that as a
  # hostname when they need to interact with it.
  db:
    # The container will be based in the "16.3-bookworm" release of the public
    # PostgreSQL image that's available in Docker Hub
    image: postgres:16.3-bookworm
    # Always restart the container automatically if it ever closes for whatever
    # reason.
    restart: always
    # Makes the database accessible at port 5432.
    ports:
      - 5432:5432
    # Stores the PostgreSQL data files in a docker volume so that they are not
    # lost when the container stops or restarts.
    volumes:
      - db-postgres-data:/var/lib/postgresql/data
    # Sets some basic configuration for the initial database in the PostgreSQL
    # instance: its name, and a pair of credentials to access it.
    environment:
      - POSTGRES_DB=vehicle_quotes
      - POSTGRES_USER=vehicle_quotes
      - POSTGRES_PASSWORD=password

# Defines the Docker volume that the db service uses to store its data files.
volumes:
  db-postgres-data:
This is a very standard definition of a Docker Compose service. We called it db, made it available via the standard PostgreSQL port (5432), and set some basic configurations for it. Check out the PostgreSQL image’s page in Docker Hub to see more complicated use cases.
To bring it to life, we can run docker compose up -d in the directory where we’ve located the compose.yaml file. Running that command will prompt Docker to download the PostgreSQL image, build a container with it, and run it. It’ll also create the db-postgres-data volume we configured and a “network” that all the services we put in the compose.yaml file will be part of. Thanks to the -d option, it will run in daemon mode; that is, as a background process. So as soon as it’s done, it gives us control of our terminal back:
$ docker compose up -d

...

[+] Running 3/3
 ✔ Network end-point-blog-dotnet-docker-deploy_default            Created  0.0s
 ✔ Volume "end-point-blog-dotnet-docker-deploy_db-postgres-data"  Created  0.0s
 ✔ Container end-point-blog-dotnet-docker-deploy-db-1             Created  0.1s
Now that we have a database up and running, we have a couple of options for connecting to it. If we have the psql command line client installed in our machine, we can connect to it directly:
$ psql -h localhost -d vehicle_quotes -U vehicle_quotes -W
Password:
psql (16.3 (Ubuntu 16.3-0ubuntu0.24.04.1))
Type "help" for help.

vehicle_quotes=#
If not, we could first connect to the container, and then open psql from there:
$ docker compose exec db bash
root@edc038da3aa4:/# psql -h localhost -d vehicle_quotes -U vehicle_quotes -W
Password:
psql (16.3 (Debian 16.3-1.pgdg120+1))
Type "help" for help.

vehicle_quotes=#
Notice how we pass db and bash as parameters to the docker compose exec command. db is the name of our service, and bash is the command that we wish to execute within it. In this case we just want to open a shell, so we use bash.
Nice. That’s all it takes to set up the database. Now on to the applications.
Deploying the admin portal web app
Like I mentioned before, our code base contains an admin portal web application. In order to deploy it, we need first to define an image, which we’ll do with a Dockerfile, and then add the configuration to run a container based on that image using Docker Compose.
The image is a self-contained package that includes all the software that the application needs to run. It’s like an executable program. One that can be run by Docker, instead of directly by the operating system. In order to build images, we use Dockerfiles. For this ASP.NET app, the Dockerfile will perform two main tasks: Specify how to build the app and how to run it. Here’s what a Dockerfile for the admin portal project could look like:
# ./Dockerfile.AdminPortal

# Pull the .NET SDK image from Microsoft's repository. We will use it to build
# our app. We also give it a name of "build" so that we can reference it later.
FROM mcr.microsoft.com/dotnet/sdk:8.0 AS build

# Now we copy all *.csproj files from the code base into the image and run
# dotnet restore. This will download and install all the NuGet packages that the
# various projects require.
WORKDIR /source

COPY source/vehicle-quotes.sln .
COPY source/VehicleQuotes.AdminPortal/VehicleQuotes.AdminPortal.csproj ./VehicleQuotes.AdminPortal/
COPY source/VehicleQuotes.Core/VehicleQuotes.Core.csproj ./VehicleQuotes.Core/
COPY source/VehicleQuotes.CreateUser/VehicleQuotes.CreateUser.csproj ./VehicleQuotes.CreateUser/
COPY source/VehicleQuotes.IntegrationTests/VehicleQuotes.IntegrationTests.csproj ./VehicleQuotes.IntegrationTests/
COPY source/VehicleQuotes.RazorTemplates/VehicleQuotes.RazorTemplates.csproj ./VehicleQuotes.RazorTemplates/
COPY source/VehicleQuotes.UnitTests/VehicleQuotes.UnitTests.csproj ./VehicleQuotes.UnitTests/
COPY source/VehicleQuotes.WebApi/VehicleQuotes.WebApi.csproj ./VehicleQuotes.WebApi/
RUN dotnet restore

# Next we copy all of the source code for all of the projects.
COPY source/VehicleQuotes.AdminPortal/. ./VehicleQuotes.AdminPortal/
COPY source/VehicleQuotes.Core/. ./VehicleQuotes.Core/
COPY source/VehicleQuotes.CreateUser/. ./VehicleQuotes.CreateUser/
COPY source/VehicleQuotes.IntegrationTests/. ./VehicleQuotes.IntegrationTests/
COPY source/VehicleQuotes.RazorTemplates/. ./VehicleQuotes.RazorTemplates/
COPY source/VehicleQuotes.UnitTests/. ./VehicleQuotes.UnitTests/
COPY source/VehicleQuotes.WebApi/. ./VehicleQuotes.WebApi/

# Now that we have everything in place, we use the dotnet publish command to
# build the VehicleQuotes.AdminPortal project.
WORKDIR /source/VehicleQuotes.AdminPortal
RUN dotnet publish -c release -o /app --no-restore

# In this last step, notice how we pull a different image here, this is the
# image that Microsoft recommends to use for running ASP.NET apps.
#
# Since by this point we already built the app, and have the executable binary
# for it, we don't need the full SDK anymore. dotnet/aspnet is a lighter weight
# image designed exclusively for running apps. In other words, it has the .NET
# runtime redistributable, not the full SDK.
#
# So here, all we do is copy the build assets from the "build" image into this
# new runtime-only one and put them in a /app directory. Then we call the .NET
# CLI to run the web app's DDL.
FROM mcr.microsoft.com/dotnet/aspnet:8.0
WORKDIR /app
COPY --from=build /app ./
ENTRYPOINT ["dotnet", "VehicleQuotes.AdminPortal.dll"]
With a Dockerfile like this, we could run the app as a stand-alone container. However, we don’t want to run it like that. Instead, we want it to be a service that’s deployable via Docker Compose, as part of a bigger ecosystem. In order to do that, we add the following to our compose.yaml file.
# ./compose.yaml

services:
  # The service is called "admin-portal" because that's the application that it
  # contains.
  admin-portal:
    # This is slightly more complex than the "db" service. Instead of using the
    # "image" option to download an off-the-shelf PostgreSQL image from
    # dockerhub, we use "build" and point to the Dockerfile we created in the
    # previous step. We also specify the current directory (i.e. the ".") as the
    # context in which the build will be performed.
    build:
      context: .
      dockerfile: Dockerfile.AdminPortal
    # We also configure this service to restart automatically if for whatever
    # reason it stops.
    restart: always
    # "8080" is the default port that ASP.NET Core 8 web applications listen to.
    # So here, we set it up so that all requests coming to the host machine to
    # port 8001 get sent to this container's port 8080. That way, reaching the
    # ASP.NET app that's running within.
    ports:
      - 8001:8080
    # This part is particular to our app. The admin portal offers the capability
    # of uploading files. Here, we're defining a Docker volume to ensure that
    # the uploaded files persist across container restarts. In this case, we are
    # linking the host machine's ./uploads directory to the container's
    # /app/wwwroot/uploads directory, which is where the uploaded files are
    # saved.
    volumes:
      - ./uploads:/app/wwwroot/uploads
    # We can use this section so set any environment variables that our app may
    # need. In the case of our admin portal here, we set the running environment
    # to Development, specify a database connection string, and the location to
    # save the uploaded files.
    environment:
      - ASPNETCORE_ENVIRONMENT=Development
      - ConnectionStrings__VehicleQuotesContext=Host=db;Database=vehicle_quotes;Username=vehicle_quotes;Password=password
      - QuoteImagesPath=/app/wwwroot/uploads
    # Finally, "entrypoint" specifies the command that should be used when
    # running the container. In this case, this is essentially the same as the
    # last line of the Dockerfile we saw above.
    entrypoint: ["sh", "-c", "dotnet VehicleQuotes.AdminPortal.dll"]

# ...
With this, we’re ready to see the application running. Run docker compose up -d again to update the infrastructure and include the new service:
$ docker compose up -d

...

[+] Running 2/2
 ✔ Container end-point-blog-dotnet-docker-deploy-db-1            Running   0.0s
 ✔ Container end-point-blog-dotnet-docker-deploy-admin-portal-1  Started   0.3s
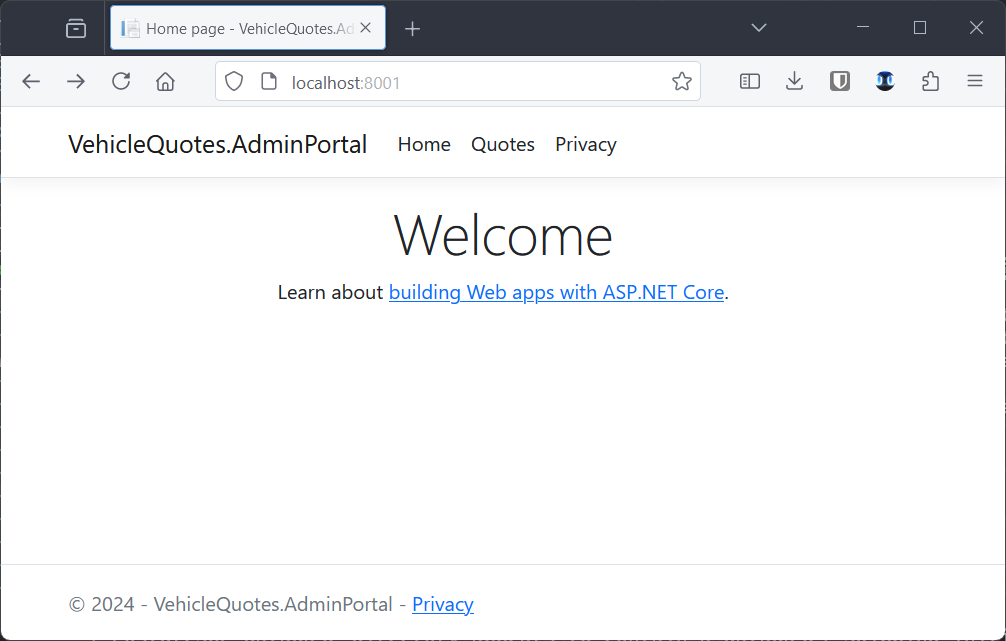
After a while of downloading and building, navigating to http://localhost:8001 should show this:
Adding a maintenance container
At this point, we have a problem though. If we try clicking on the “Quotes” link in the top navigation bar, we see this:
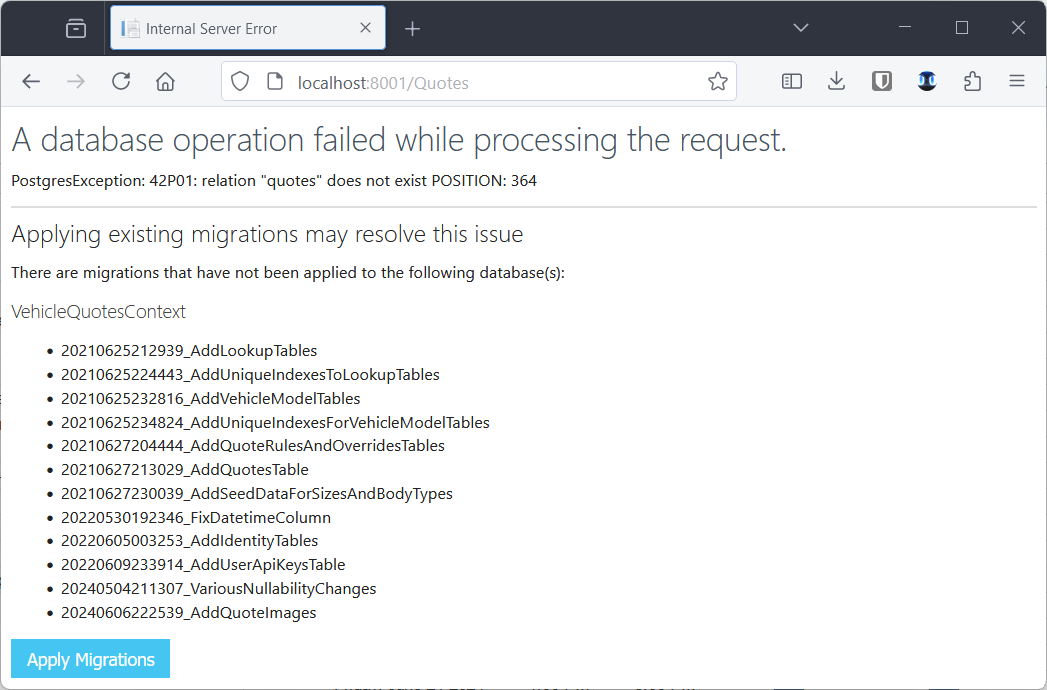
We need to run the database migrations. In order to do that, we need an environment that has all of our source code and the full .NET SDK with the Entity Framework Core command line tool. That is, an environment that can build the app and run the .NET CLI. While we could install that in the host machine and run our migrations that way; we could also encapsulate it in a container. That way we get the benefits of portability, etc.
Of course, that maintenance container needs an image. And images are defined in Dockerfiles. Here’s a Dockerfile that would serve our purpose:
# ./Dockerfile.Maintenance

# Same as before, we pull the official image that contains the full .NET SDK.
FROM mcr.microsoft.com/dotnet/sdk:8.0 AS build

# Here we install the psql command line client. A useful tool to have in a
# container meant for system maintenance.
RUN apt-get update && export DEBIAN_FRONTEND=noninteractive \
    && apt-get -y install --no-install-recommends postgresql-client

# We also install the dotnet-ef tool which allows us access to commands for
# managing the database and migrations.
RUN dotnet tool install dotnet-ef --global
ENV PATH="$PATH:/root/.dotnet/tools"

# Finally, we copy all of our source code.
WORKDIR /source

COPY source/vehicle-quotes.sln .
COPY source/VehicleQuotes.AdminPortal/VehicleQuotes.AdminPortal.csproj ./VehicleQuotes.AdminPortal/
COPY source/VehicleQuotes.Core/VehicleQuotes.Core.csproj ./VehicleQuotes.Core/
COPY source/VehicleQuotes.CreateUser/VehicleQuotes.CreateUser.csproj ./VehicleQuotes.CreateUser/
COPY source/VehicleQuotes.IntegrationTests/VehicleQuotes.IntegrationTests.csproj ./VehicleQuotes.IntegrationTests/
COPY source/VehicleQuotes.RazorTemplates/VehicleQuotes.RazorTemplates.csproj ./VehicleQuotes.RazorTemplates/
COPY source/VehicleQuotes.UnitTests/VehicleQuotes.UnitTests.csproj ./VehicleQuotes.UnitTests/
COPY source/VehicleQuotes.WebApi/VehicleQuotes.WebApi.csproj ./VehicleQuotes.WebApi/
RUN dotnet restore

COPY source/VehicleQuotes.AdminPortal/. ./VehicleQuotes.AdminPortal/
COPY source/VehicleQuotes.Core/. ./VehicleQuotes.Core/
COPY source/VehicleQuotes.CreateUser/. ./VehicleQuotes.CreateUser/
COPY source/VehicleQuotes.IntegrationTests/. ./VehicleQuotes.IntegrationTests/
COPY source/VehicleQuotes.RazorTemplates/. ./VehicleQuotes.RazorTemplates/
COPY source/VehicleQuotes.UnitTests/. ./VehicleQuotes.UnitTests/
COPY source/VehicleQuotes.WebApi/. ./VehicleQuotes.WebApi/

# No ENTRYPOINT here because there's no specific command to run.
This Dockerfile is very similar to the first portion of the one for the admin portal. It essentially creates a .NET development environment. Notice how it doesn’t include an ENTRYPOINT command. This is expected, as this container’s purpose is to allow us to connect to it to run any number of maintenance tasks on demand. There isn’t really any process that it needs to run upon start.
Now, we want to deploy the maintenance container when we do docker compose up -d. To that end, we add the following to the services section in our compose.yaml file:
# ./compose.yaml

services:

  # ...

  maintenance:
    # Similar to the admin-portal, we specify the context and Dockerfile to
    # build the image.
    build:
      context: .
      dockerfile: Dockerfile.Maintenance
    # The maintenance tasks will need to know where to find the database. So we
    # set the connection string environment variable.
    environment:
      - ConnectionStrings__VehicleQuotesContext=Host=db;Database=vehicle_quotes;Username=vehicle_quotes;Password=password
    # "sleep infinity" here makes sure the container doesn't close immediately
    # after starting up, which is the expected behavior when a container has no
    # start up command or has a command that just runs and ends. That is, as
    # opposed to a long running service, like a web app.
    command: sleep infinity

# ...
With these additions, running docker compose up -d again will result in the new maintenance container being created:
$ docker compose up -d

...

[+] Running 3/3
 ✔ Container end-point-blog-dotnet-docker-deploy-admin-portal-1  Running   0.0s
 ✔ Container end-point-blog-dotnet-docker-deploy-db-1            Running   0.0s
 ✔ Container end-point-blog-dotnet-docker-deploy-maintenance-1   Started   0.4s
Now we can finally connect to the brand new maintenance container:
$ docker compose exec maintenance bash
root@14613bcf1756:/source#
Then inspect the status of the migrations:
root@14613bcf1756:/source# dotnet ef migrations list -s ./VehicleQuotes.AdminPortal -p ./VehicleQuotes.Core
Build started...
Build succeeded.

...

20210625212939_AddLookupTables (Pending)
20210625224443_AddUniqueIndexesToLookupTables (Pending)
20210625232816_AddVehicleModelTables (Pending)
20210625234824_AddUniqueIndexesForVehicleModelTables (Pending)
20210627204444_AddQuoteRulesAndOverridesTables (Pending)
20210627213029_AddQuotesTable (Pending)
20210627230039_AddSeedDataForSizesAndBodyTypes (Pending)
20220530192346_FixDatetimeColumn (Pending)
20220605003253_AddIdentityTables (Pending)
20220609233914_AddUserApiKeysTable (Pending)
20240504211307_VariousNullabilityChanges (Pending)
20240606222539_AddQuoteImages (Pending)
root@14613bcf1756:/source#
And run them:
root@14613bcf1756:/source# dotnet ef database update -s ./VehicleQuotes.AdminPortal -p ./VehicleQuotes.Core
Build started...
Build succeeded.

...

Done.
root@14613bcf1756:/source#
With that done, we can now go to the browser again and bring up the http://localhost:8001/Quotes page. Which now looks like this:
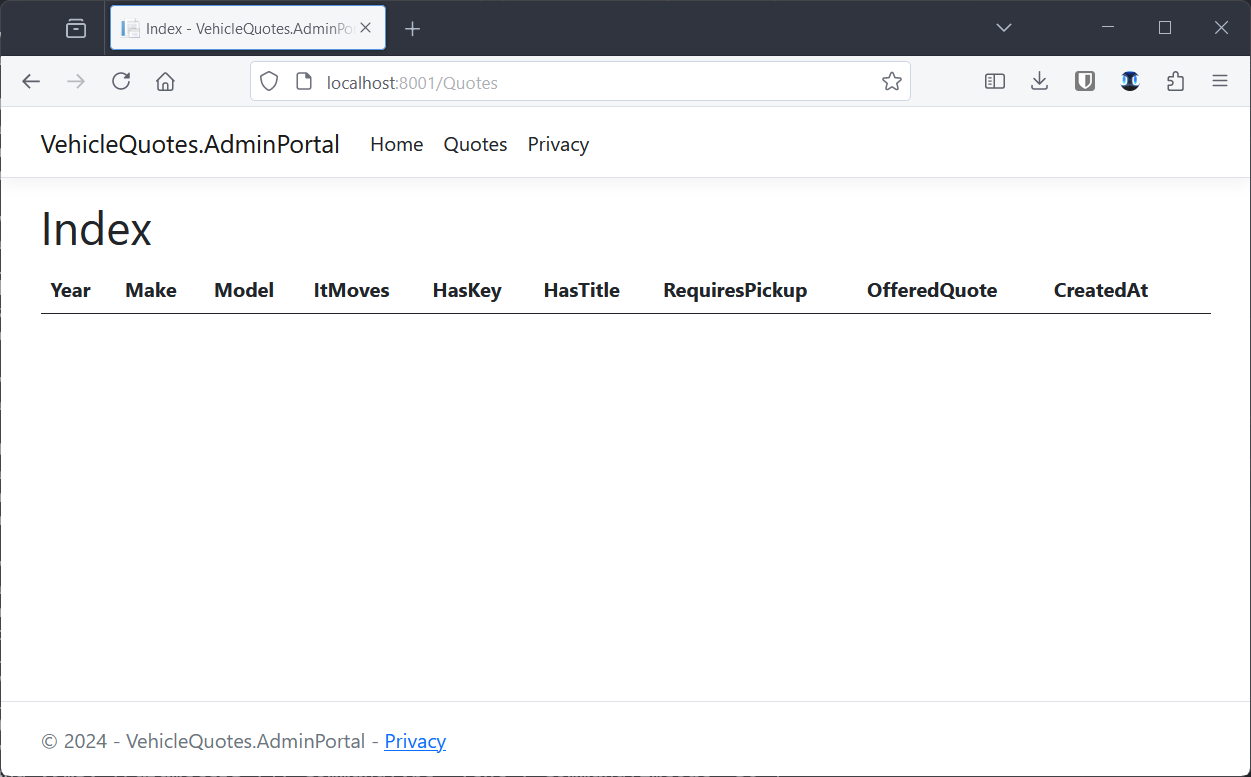
An empty—but working—page for listing database records!
Deploying the web API
Now let’s look at how to deploy another of our system’s runtime components: the web API. The process of setting this up is nearly identical to the admin portal’s. After all, both are ASP.NET Core web applications. Really, the only difference is that one serves HTML and the other serves JSON. To the runtime, they are the same type of thing. And sure enough, here’s the web API’s Dockerfile:
# ./Dockerfile.WebApi

FROM mcr.microsoft.com/dotnet/sdk:8.0 AS build

WORKDIR /source

# copy sln and csproj files and restore
COPY source/vehicle-quotes.sln .
COPY source/VehicleQuotes.AdminPortal/VehicleQuotes.AdminPortal.csproj ./VehicleQuotes.AdminPortal/
COPY source/VehicleQuotes.Core/VehicleQuotes.Core.csproj ./VehicleQuotes.Core/
COPY source/VehicleQuotes.CreateUser/VehicleQuotes.CreateUser.csproj ./VehicleQuotes.CreateUser/
COPY source/VehicleQuotes.IntegrationTests/VehicleQuotes.IntegrationTests.csproj ./VehicleQuotes.IntegrationTests/
COPY source/VehicleQuotes.RazorTemplates/VehicleQuotes.RazorTemplates.csproj ./VehicleQuotes.RazorTemplates/
COPY source/VehicleQuotes.UnitTests/VehicleQuotes.UnitTests.csproj ./VehicleQuotes.UnitTests/
COPY source/VehicleQuotes.WebApi/VehicleQuotes.WebApi.csproj ./VehicleQuotes.WebApi/
RUN dotnet restore

# copy everything else
COPY source/VehicleQuotes.AdminPortal/. ./VehicleQuotes.AdminPortal/
COPY source/VehicleQuotes.Core/. ./VehicleQuotes.Core/
COPY source/VehicleQuotes.CreateUser/. ./VehicleQuotes.CreateUser/
COPY source/VehicleQuotes.IntegrationTests/. ./VehicleQuotes.IntegrationTests/
COPY source/VehicleQuotes.RazorTemplates/. ./VehicleQuotes.RazorTemplates/
COPY source/VehicleQuotes.UnitTests/. ./VehicleQuotes.UnitTests/
COPY source/VehicleQuotes.WebApi/. ./VehicleQuotes.WebApi/

# build app
WORKDIR /source/VehicleQuotes.WebApi
RUN dotnet publish -c release -o /app --no-restore

# final image
FROM mcr.microsoft.com/dotnet/aspnet:8.0
WORKDIR /app
COPY --from=build /app ./
ENTRYPOINT ["dotnet", "VehicleQuotes.WebApi.dll"]
Very similar to the admin portal’s Dockerfile. The only differences are the sections for building and running the app towards the end of the file, on account of the directories and resulting DDL name being different. Other than that, they are pretty much identical.
Same story on the Docker Compose side of things:
# ./compose.yaml

services:

  #...

  web-api:
    build:
      context: .
      dockerfile: Dockerfile.WebApi
    restart: always
    # We want to expose this service in a different port than the admin portal,
    # we chose 8002.
    ports:
      - 8002:8080
    # A different set of environment variables, but the structure is the same.
    environment:
      - ASPNETCORE_ENVIRONMENT=Development
      - ConnectionStrings__VehicleQuotesContext=Host=db;Database=vehicle_quotes;Username=vehicle_quotes;Password=password
      - MailSettings__Server=SMTP_SERVER_URL
      - MailSettings__Port=2525
      - MailSettings__SenderName=Vehicle Quotes
      - MailSettings__SenderEmail=info@vehiclequotes.com
      - MailSettings__UserName=SMTP_SERVER_USER_NAME
      - MailSettings__Password=SMTP_SERVER_PASSWORD
    # The entrypoint command is different because the DLL has a different file
    # name.
    entrypoint: ["sh", "-c", "dotnet VehicleQuotes.WebApi.dll"]

#...
It has the same overall setup as the admin portal. This time we’ve chosen a different port, configured a different set of environment variables, and run the web API’s DLL. Other than that, it’s the same. Now docker compose up -d can be run again, and after a while you should see:
$ docker compose up -d

...

[+] Running 4/4
 ✔ Container end-point-blog-dotnet-docker-deploy-web-api-1       Started   0.4s
 ✔ Container end-point-blog-dotnet-docker-deploy-maintenance-1   Running   0.0s
 ✔ Container end-point-blog-dotnet-docker-deploy-db-1            Running   0.0s
 ✔ Container end-point-blog-dotnet-docker-deploy-admin-portal-1  Running   0.0s
The web API has a Swagger UI that should now be accessible at http://localhost:8002/swagger:

Excellent. We now have a very basic implementation of our deployment strategy. We have managed to build and run all the apps we need. We also have a special container with a full development environment that we can use to perform a number of maintenance tasks. However, there are various issues that we still need to address. Let’s do that next.
Looking at the logs
Before that, though, let’s look at the logs being produced by the applications that have been deployed. You can see the logs for the entire system with:
docker compose logs -f
That command produces a single log stream with messages from all the services. To look at the logs of a particular service, all we need to do is specify the service name. For example docker compose logs db -f or docker compose logs web-api -f.
That’s all there is to it as far as logs go. However, if we look at the logs for our current deployment, they reveal the first issue that we need to attend to…
Persisting data protection keys
If we look at the logs of the admin portal or web API containers, we see messages like this:
web-api-1       | warn: Microsoft.AspNetCore.DataProtection.Repositories.FileSystemXmlRepository[60]
web-api-1       |       Storing keys in a directory '/root/.aspnet/DataProtection-Keys' that may not be persisted outside of the container. Protected data will be unavailable when container is destroyed. For more information go to https://aka.ms/aspnet/dataprotectionwarning
As it turns out, the data protection subsystem in ASP.NET Core (which is used for cookies and the like) depends on the app being able to store and persist files. As the message says, this is problematic for containers. Because upon container destruction, which is a usual and expected part of a container’s lifecycle, the internal container’s file system gets wiped out. That is, unless we use Docker volumes to store the files that should persist beyond a particular container’s life. So, in order to get rid of these warnings, that’s exactly what we’re going to have to do.
First we create a data-protection-keys directory in our host machine. And inside it, we create one directory for each of the ASP.NET Core apps. It ends up looking like this:
data-protection-keys/
├── admin-portal
└── web-api
Next we have to make sure the apps in the containers have access to these directories. In order to do that, we need to configure the compose.yaml so that it creates new Docker volumes that are linked to those locations:
# ./compose.yaml

services:
  admin-portal:
    #...
    volumes:
      - ./data-protection-keys/admin-portal:/data-protection-keys/admin-portal
    #...

  web-api:
    #...
    volumes:
      - ./data-protection-keys/web-api:/data-protection-keys/web-api
    #...
#...
This means that, for example, whenever an app in the container references /data-protection-keys/admin-portal; it will actually be accessing the ./data-protection-keys/admin-portal directory in the host machine. Same deal for the web-api one.
We also need to configure the applications themselves so that they store their data protection keys in the locations that we’ve created. For that, we add environment variables for the containers to set the paths:
# ./compose.yaml

services:
  admin-portal:
    #...
    environment:
      - AdminPortalDataProtectionKeysPath=/data-protection-keys/admin-portal
    #...

  web-api:
    #...
    environment:
      - WebApiDataProtectionKeysPath=/data-protection-keys/web-api
    #...
#...
And add the following code to each of the apps’ Program.cs files:
// ./source/VehicleQuotes.AdminPortal/Program.cs

builder.Services.AddDataProtection().PersistKeysToFileSystem(
    new DirectoryInfo(
        builder.Configuration["AdminPortalDataProtectionKeysPath"] ??
            throw new InvalidOperationException("Config setting 'AdminPortalDataProtectionKeysPath' not found.")
    )
);
// ./source/VehicleQuotes.WebApi/Program.cs

builder.Services.AddDataProtection().PersistKeysToFileSystem(
    new DirectoryInfo(
        builder.Configuration["WebApiDataProtectionKeysPath"] ??
            throw new InvalidOperationException("Config setting 'WebApiDataProtectionKeysPath' not found.")
    )
);
There isn’t much to comment about the code really. It’s just some .NET boilerplate to configure that specific detail of the data protection services. It also makes sure that the values are always present. Errors are raised if not.
Now that everything is wired up like that, we can hit docker compose up -d --build and the warning message should be gone if we look at the logs.
Notice how we used the --build option this time. That tells Docker that it needs to rebuild the images from scratch. Image rebuild means running through the Dockerfiles again. And that means running dotnet build again. In short, we have to do this to make sure that the code changes that we made are included in the new builds.
Storing sensitive information with secrets
Another issue that we need to address is how to handle sensitive information like passwords in our config files. So far we’ve been putting them in plain text in compose.yaml. The problem with this is that this file is meant to be pushed to version control and we don’t want passwords in there. The spread of sensitive information like that should be more controlled. Ideally, we’d store them in files that never leave the server where the system is deployed.
Docker Compose has a feature that works just like that. Through Docker Compose secrets, we can create text files outside of the compose.yaml and put the database password and connection string in them. These files will live only in the server, never uploaded to version control.
Let’s create a new secrets directory and create these two files within it:
-
./secrets/vehicle-quotes-db-connection-string.txt:Host=db;Database=vehicle_quotes;Username=vehicle_quotes;Password=password -
./secrets/vehicle-quotes-db-password.txt:password
Ending up looking like this:
secrets/
├── vehicle-quotes-db-connection-string.txt
└── vehicle-quotes-db-password.txt
Now, at the bottom of compose.yaml, we add a new secrets section:
# ./compose.yaml

#...

secrets:
  vehicle-quotes-db-password:
    file: ./secrets/vehicle-quotes-db-password.txt
  vehicle-quotes-db-connection-string:
    file: ./secrets/vehicle-quotes-db-connection-string.txt
Then we include the secrets in the services that need them:
# ./compose.yaml

services:
  admin-portal:
    #...
    secrets:
      - vehicle-quotes-db-connection-string
    #...

  web-api:
    #...
    secrets:
      - vehicle-quotes-db-connection-string
    #...

  db:
    #...
    secrets:
      - vehicle-quotes-db-password
    #...

  maintenance:
    #...
    secrets:
      - vehicle-quotes-db-connection-string
    #...
#...
With this, Docker Compose will add files in the resulting containers under the /run/secrets/ directory with the contents of their referenced secrets. So, for example, in the case of the admin-portal container, a /run/secrets/vehicle-quotes-db-connection-string file will be created in the container’s internal file system, with the same contents as the ./secrets/vehicle-quotes-db-connection-string.txt file. Similar thing for the others.
Now that the secrets are materialized as files within the containers, let’s see how we put them to use.
For the admin-portal container, we injected the vehicle-quotes-db-connection-string secret into it. This file contains the database connection string. And we need to pass that to the running app via an environment variable. In order to do so, we can change the entrypoint command to this:
# ./compose.yaml

services:
  admin-portal:
  #...
  entrypoint: [
    "sh", "-c",
    "export ConnectionStrings__VehicleQuotesContext=$(cat /run/secrets/vehicle-quotes-db-connection-string) &&
    dotnet VehicleQuotes.AdminPortal.dll"
  ]

#...
We’ve modified the command to set the ConnectionStrings__VehicleQuotesContext to the contents of the /run/secrets/vehicle-quotes-db-connection-string file. The export command defines the environment variable for this particular command; and the $(cat ...) part returns the contents of the file.
We should also remove the ConnectionStrings__VehicleQuotesContext variable from the admin-portal service’s environment section.
For the web-api service, we do the same thing. The only difference is that its entrypoint command calls for VehicleQuotes.WebApi.dll instead of VehicleQuotes.AdminPortal.dll.
For the db service, the setup is a little different. A little simpler in fact. The official PostgreSQL image has a shortcut for specifying the database user password via Docker Compose secrets. All we need to do is define this new POSTGRES_PASSWORD_FILE environment variable and remove the POSTGRES_PASSWORD one:
# ./compose.yaml

services:
  #...

  db:
  #...
  environment:
    - POSTGRES_PASSWORD_FILE=/run/secrets/vehicle-quotes-db-password
    # - POSTGRES_PASSWORD=password     <-- remove this one
#...
Try docker compose up -d again and test the apps. Everything should still work well.
In the maintenance container, we also have to remove the ConnectionStrings__VehicleQuotesContext environment variable. That unfortunately means that the connection string will no longer be automatically available for us to run database related tasks. Just like other containers, it will be in a /run/secrets/vehicle-quotes-db-connection-string file. So, whenever we want to interact with the database, like when running migrations, we need to manually export the variable. Something like this:
$ docker compose exec maintenance bash
root@2732a06871c0:/source# export ConnectionStrings__VehicleQuotesContext=$(cat /run/secrets/vehicle-quotes-db-connection-string)
root@2732a06871c0:/source# dotnet ef migrations list -s ./VehicleQuotes.AdminPortal -p ./VehicleQuotes.Core
Build started...
Build succeeded.

...
Parameterizing compose.yaml to support multiple deployment environments
A common requirement when deploying applications is to be able to do so in multiple environments. There’s generally a “live” or “production” environment where the system runs and end users access it. There can also be others: staging, test, development, etc. Ideally, we’d use the same set of Docker and Compose files, with slight changes, in order to deploy variants of the system depending on the environment.
Some settings like ports, passwords, or SMTP credentials are the types of things that usually vary per environment. Luckily for us, Docker Compose supports .env files that can be used to parameterize certain aspects of the compose.yaml file.
We can extract the values that vary from our compose.yaml file, and put them in a separate .env file that looks like this:
ADMIN_PORTAL_PORT=8001
WEB_API_PORT=8002
DB_PORT=5432
POSTGRES_DB=vehicle_quotes
POSTGRES_USER=vehicle_quotes
MailSettings__Server=SMTP_SERVER_URL
MailSettings__Port=2525
MailSettings__SenderName=Vehicle Quotes
MailSettings__SenderEmail=info@vehiclequotes.com
MailSettings__UserName=SMTP_SERVER_USER_NAME
MailSettings__Password=SMTP_SERVER_PASSWORD
Here we have the ports that we want to expose the various services on, the database name and user name, and some email delivery settings. This file wont be pushed to version control, and each deployment will have its own version of it.
The compose.yaml file can reference the values defined in the .env file using the following syntax: ${VAR_NAME}. Here’s how we change our compose.yaml to take advantage of the settings defined in the .env file:
# ./compose.yaml

services:
  admin-portal:
    #...
    ports:
      - ${ADMIN_PORTAL_PORT}:8080
    #...

  web-api:
    #...
    ports:
      - ${WEB_API_PORT}:8080
    #...
    environment:
      #...
      - MailSettings__Server=${MAIL_SETTINGS_SERVER}
      - MailSettings__Port=${MAIL_SETTINGS_PORT}
      - MailSettings__SenderName=${MAIL_SETTINGS_SENDER_NAME}
      - MailSettings__SenderEmail=${MAIL_SETTINGS_SENDER_EMAIL}
      - MailSettings__UserName=${MAIL_SETTINGS_USER_NAME}
      - MailSettings__Password=${MAIL_SETTINGS_PASSWORD}
    #...

  db:
    #...
    ports:
      - ${DB_PORT}:5432
    #...
    environment:
      - POSTGRES_DB=${POSTGRES_DB}
      - POSTGRES_USER=${POSTGRES_USER}
      #...
    #...

#...
Once again, we can run docker compose up -d and everything should be fine.
Waiting for the database to be ready
Sometimes some services need to wait for others to come online before they can start up. A common scenario is to wait for the database to be ready before running apps that depend on it. We can do that in Docker Compose thanks to the depends_on and healthcheck settings. We can update our compose.yaml so that the admin portal and web API services only start after the database is up and running and ready to receive requests. Here’s how:
# ./compose.yaml

services:
  admin-portal:
    #...
    # This specifies that the admin-portal service depends on the db to be
    # healthy in order to start up. The db service's healthcheck setting is how
    # it determines whether it is healthy or not.
    depends_on:
      db:
        condition: service_healthy

  web-api:
    #...
    # Exact same setting as the one in admin-portal.
    depends_on:
      db:
        condition: service_healthy

  db:
    #...
    # Here we configure this service to offer a healthcheck that other services
    # can use to determine if it's ready to be depended upon. In this case, we
    # leverage PostgreSQL's pg_isready tool. It is called by the specified
    # timeout, at the specified interval, and with as many retries as specified
    # in the settings below.
    healthcheck:
      test: "pg_isready -U ${POSTGRES_USER}"
      interval: 10s
      timeout: 5s
      retries: 5

#...
The most interesting part is the healthcheck setting in the db service which leverages a PostgreSQL-specific tool to check whether the database is ready. Other software will have other methods to do checks like this, but PostgreSQL’s is thankfully pretty straightforward.
Serving the apps with NGINX
Another common pattern for serving web applications is to use NGINX as a reverse proxy that funnels HTTP traffic coming from the internet into the application. As you may have noticed, we haven’t talked about HTTPS so far. This aspect is something that can be elegantly handled by NGINX as well. In this last section we see how we can set up NGINX to expose our apps to the world.
First, we need to create some custom items in the default NGINX configuration file. Its default location will depend on the OS version and flavor you installed NGINX on, but for Rocky Linux 9, it usually lives in /etc/nginx/nginx.conf. First, we need to declare our upstream servers that will point to the ports where the web API and admin portals are listening:
upstream admin_portal {
    server localhost:8001;
}

upstream web_api {
    server localhost:8002;
}
Then, we will add a server that listens in the standard port 80 and proxies the /admin and /api URLs to the admin_portal and web_api upstream servers respectively:
server {
    listen 80;
    server_name vehiclequotes.com;

    location /admin {
        proxy_pass http://admin_portal;
        proxy_http_version 1.1;
        proxy_set_header Connection keep-alive;
        proxy_set_header Host $host;
        proxy_set_header X-Forwarded-For $proxy_add_x_forwarded_for;
        proxy_set_header X-Forwarded-Proto $scheme;
    }

    location /api {
        proxy_pass http://web_api;
        proxy_http_version 1.1;
        proxy_set_header Connection keep-alive;
        proxy_set_header Host $host;
        proxy_set_header X-Forwarded-For $proxy_add_x_forwarded_for;
        proxy_set_header X-Forwarded-Proto $scheme;
    }
}
Those are the basic settings needed to serve our applications in a single domain through different locations. This allows having a live frontend application that will eventually consume our API endpoints that lives in the same server and domain, avoiding possible Cross-Origin Resource Sharing (CORS) issues when establishing the workflow between the different web applications.
If we also have an SSL certificate that we want to use to securely serve our apps, we can use a free service such as Let’s Encrypt to create it. Once we’re in possession of the certificate files and placed them on the server, we need to perform a few extra tweaks to our nginx.conf file.
- First, let’s make our server listen on port 443 (HTTPS), and point to our
.cerand.keyfiles in the updated entry:
server {
    listen 443 ssl;
    server_name vehiclequotes.com;
    ssl_certificate /etc/certs/live/vehiclequotes.com/fullchain.cer;
    ssl_certificate_key /etc/certs/live/vehiclequotes.com/vehiclequotes.com.key;

    location /admin {
        proxy_pass http://admin_portal;
        proxy_http_version 1.1;
        proxy_set_header Connection keep-alive;
        proxy_set_header Host $host;
        proxy_set_header X-Forwarded-For $proxy_add_x_forwarded_for;
        proxy_set_header X-Forwarded-Proto $scheme;
    }

    location /api {
        proxy_pass http://web_api;
        proxy_http_version 1.1;
        proxy_set_header Connection keep-alive;
        proxy_set_header Host $host;
        proxy_set_header X-Forwarded-For $proxy_add_x_forwarded_for;
        proxy_set_header X-Forwarded-Proto $scheme;
    }
}
- Second, let’s add a new server for port 80 (non-HTTPS) that will redirect permanently to our new secure location:
server {
    listen 80;
    server_name vehiclequotes.com;
    return 301 https://$server_name$request_uri;
}
- Finally, let’s restart the NGINX service to apply our changes. The command that restarts the service will vary depending on the OS we’re running on the server. For Rocky Linux 9, we can do that by running the command
sudo systemctl restart nginx.
You can find the resulting nginx.conf file in the project’s repo in GitHub.
That’s all for now
And that’s it! In this article, we’ve seen how we can approach deploying a .NET system into production using Docker Compose.
We saw how to organize the code and configuration files using Git submodules. We addressed a few important edge cases and gotchas like properly configuring Data Protection keys, having a container for performing maintenance tasks, ensuring certain files persist across restarts, and bringing up services in a certain order via depends_on settings.
We even saw how to allow our web applications to be accessible to the outside world with NGINX through a set of reverse proxying rules, and as a bonus, to be securely served with SSL.
dotnet aspdotnet csharp docker nginx
Comments